
Welcome to the Paddle for WooCommerce guide. Follow the instructions below to learn how to set up Paddle, connect with our plugin, and start selling digital products online.
Install the Plugin
Install the Paddle for WooCommerce plugin on your WordPress store. Installing a plugin is easy, but we've prepared a document for you.
Activate the license
After installing the plugin, you must activate its license to use it. Read this guide to learn how to verify and activate the license.
Paddle Setup
Our plugin enables you to easily connect with Paddle. Follow our Paddle setup guide to get up and running with Paddle. We will need these credentials in the Plugin Setup.
Plugin Setup
From the WooCommerce > Settings menu, go to the Payment tab and enable the Paddle gateway to activate the gateway.
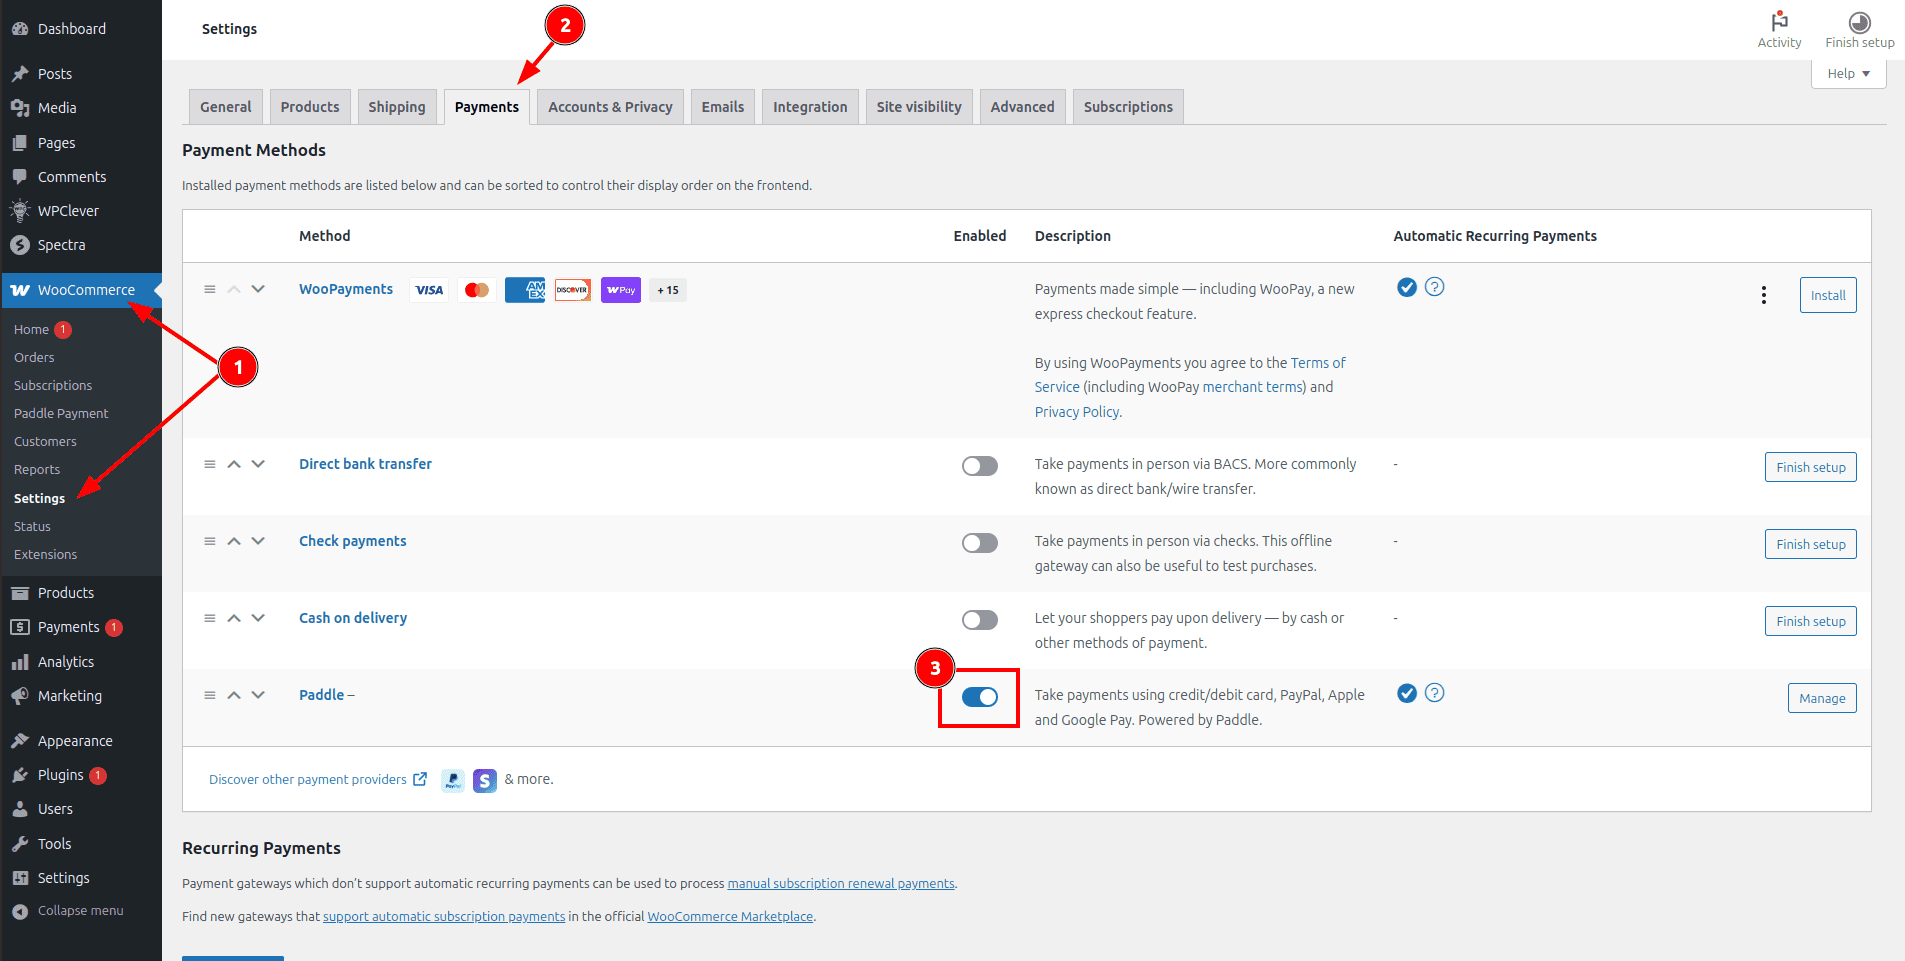
Click on the Manage button to enter the plugin setup page.

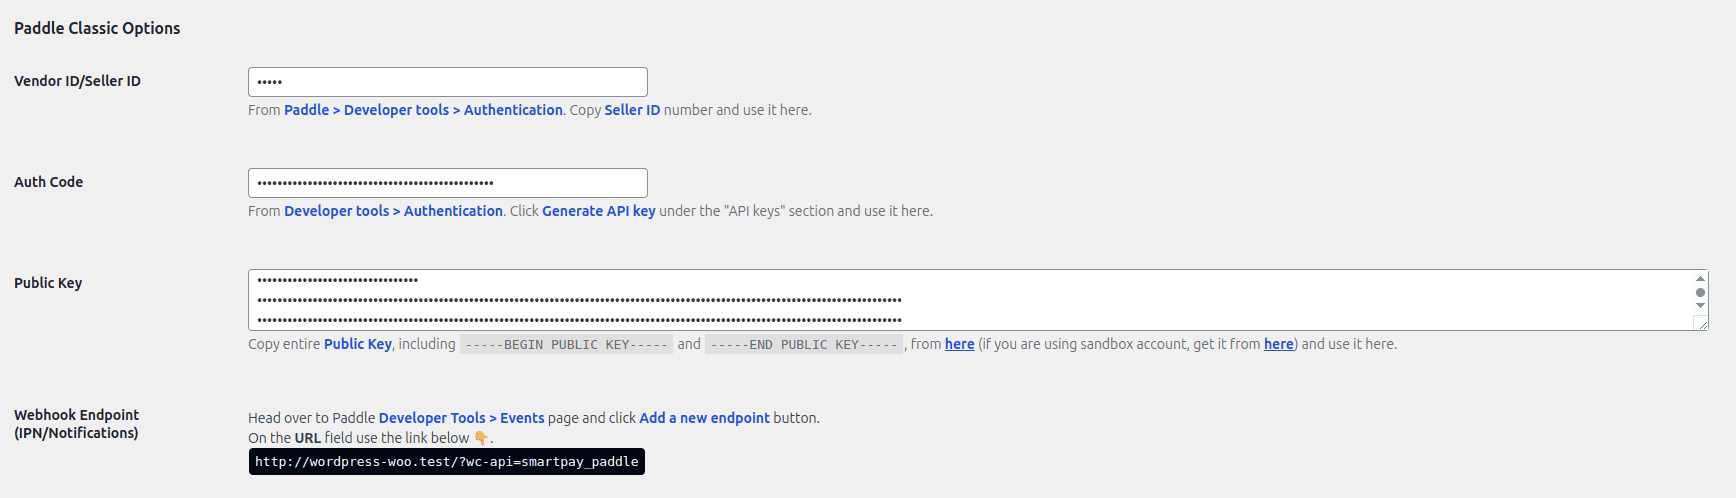
In the setup page, paste the Seller ID, API Key, Client-side token, and Notification secret key that you have copied before.
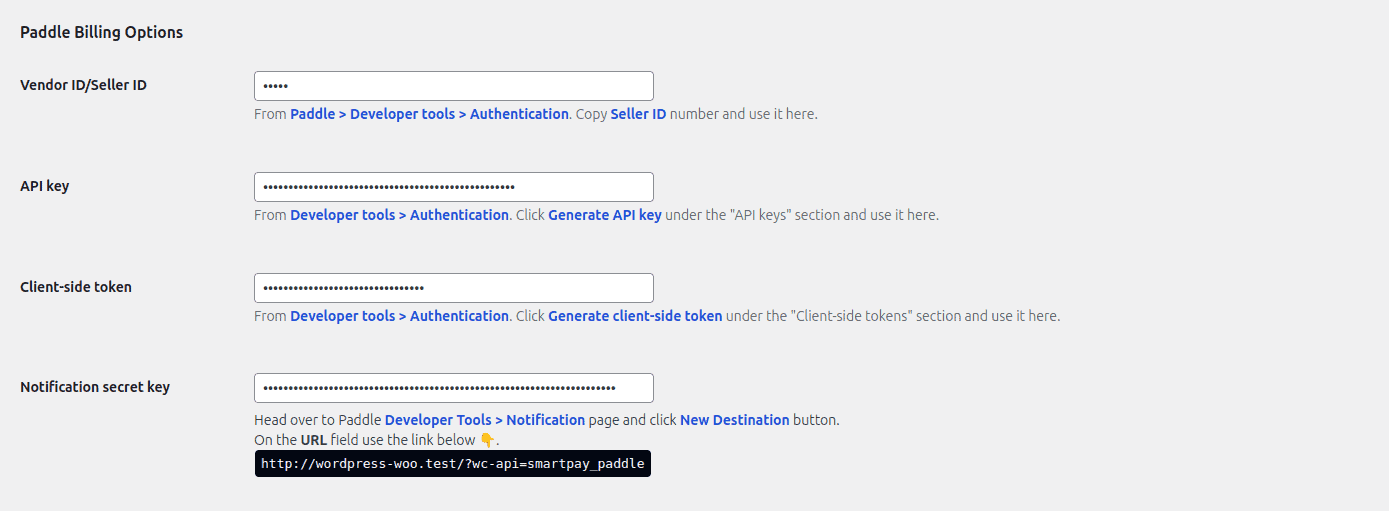
You can keep the rest of the settings as defaults or change them according to your needs.
Finally, click the Save changes button to save the plugin settings.
Product Syncing in Paddle
You do not need to manually sync or create a similar product in Paddle. Paddle for WooCommerce handles this process. Your products will be synced to Paddle automatically on the first checkout.