Before you start, make sure you have a verified Paddle account. If you don’t have one, go to Paddle's sign-up page to create and verify it. You can use Paddle's sandbox account to test payments without using any real money. You can learn more about test payments here.
Configuring Paddle
Step 1: Paddle Credentials
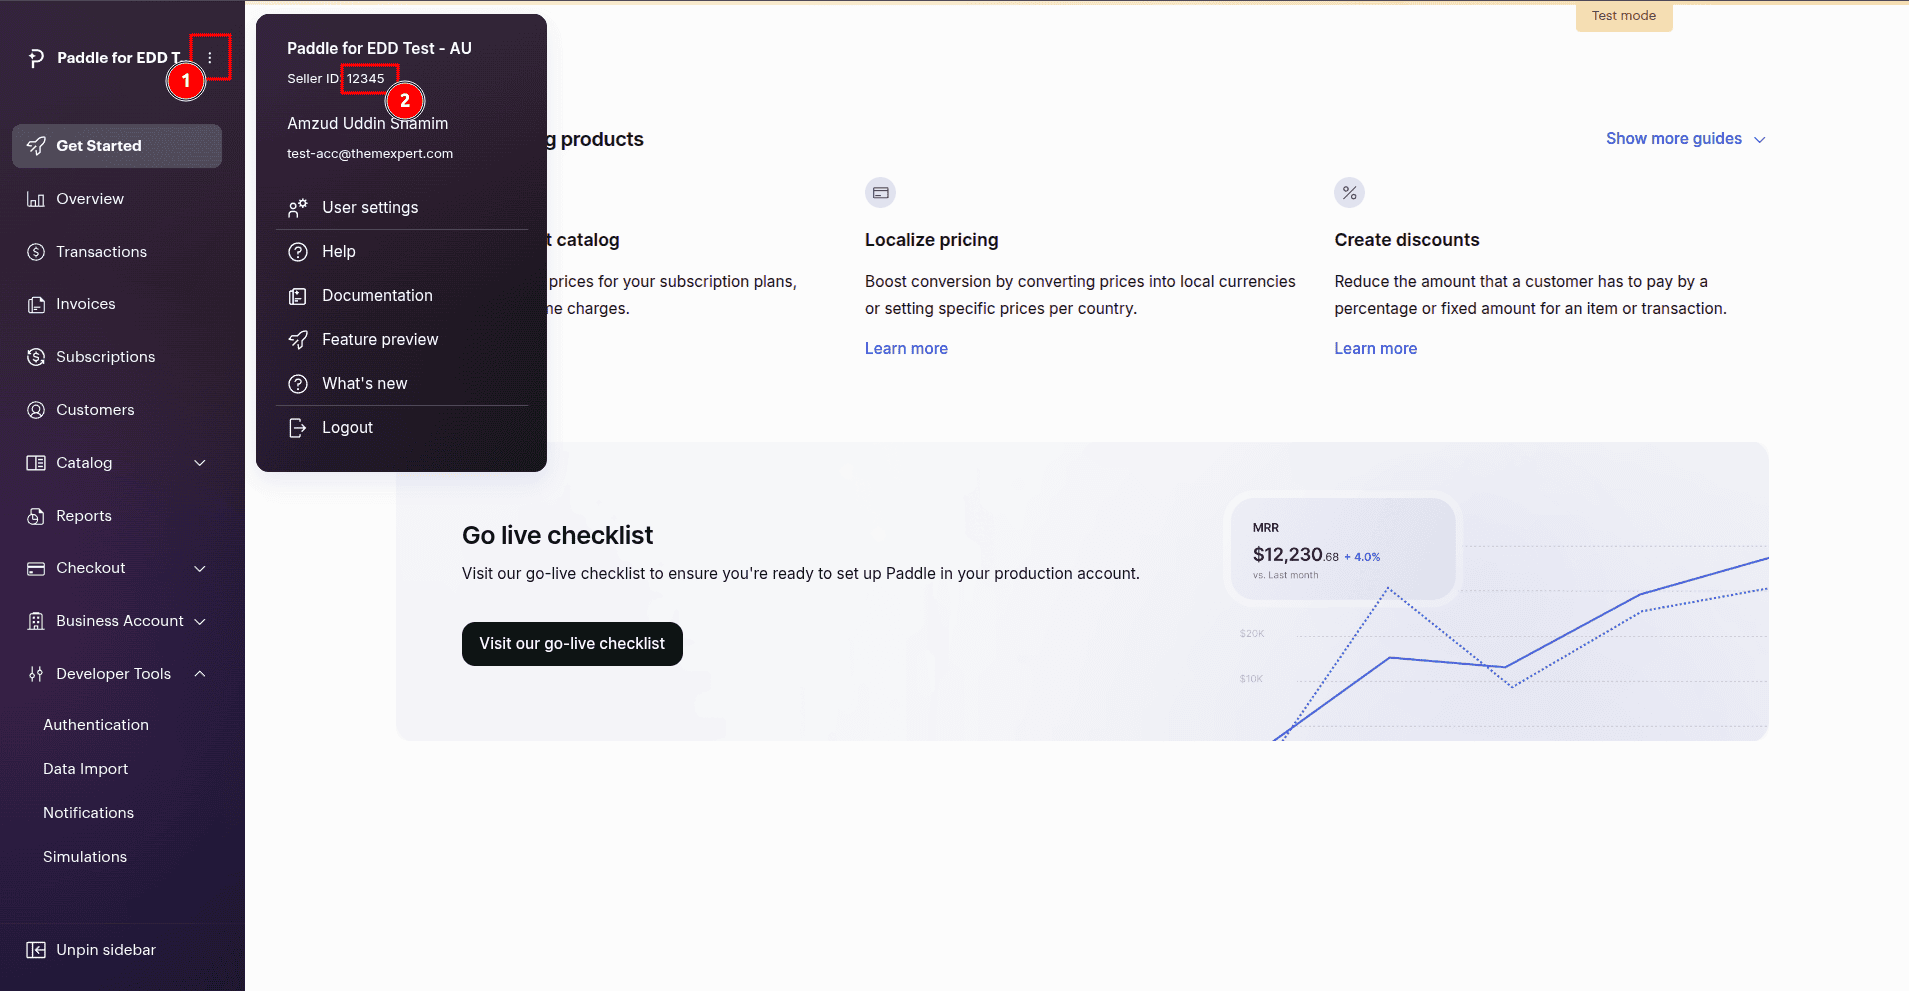
Seller ID:
Log in to your Paddle dashboard. If you are using Paddle Sandbox, log in here.
Click the three-dot button in the upper left part of the dashboard and copy the Seller ID. Please refer to the following image for a better understanding.
API Key:
Go to Developer Tools > Authentication > API Keys and click the New API Key button, and fill in the following information.
In the Name field, provide a name for the API key.
In the Description field, provide a short description.
Click on Expires at and check Never Expires.
In Permissions, check All for both Read and Write.
Click the Save button.
You will get an API Key. Copy it, you will need this in the plugin settings.
(Once you close the window, you will not be able to view it again. So, make sure to copy before closing the pop-up.)
Client-side Token:
Go to Developer Tools > Authentication > Client-side tokens and click the New Client-side token button, and fill in the following information.
In the Name field, provide a name for the token.
In the Description field, provide a short description.
Click the Save button.
Click the three-dot button next to the newly created token entry, then click Copy token. You will need this in the plugin settings.
Add Credentials to the plugin:
Now paste the copied Seller ID, API Key, and Client-side token into their respective fields in the plugin settings, then click the Save changes button.
Step 2: Instant Notification (INS) Setup
Go to the Paddle plugin settings. Copy the URL provided in the Notification Secret Key section.
Log in to your Paddle dashboard. If you are using Paddle Sandbox, log in here.
Go to Developer Tools > Notifications and click the New destination button, and fill in the following information.
In the Description field, provide a short description.
In the Notification type selection, select Webhook.
In the URL field, paste the URL you got from the plugin settings page's Notification Secret Key section.
In the Usage type selection, select Platform only.
In the Events section, check Select all events.
Click the Save destination button.
Now, click the three-dot button next to the newly created destination and click Edit destination.
Copy the Secret key.
Now, paste the copied Secret key in the Notification Secret Key field in the plugin settings.
Click Save changes button.
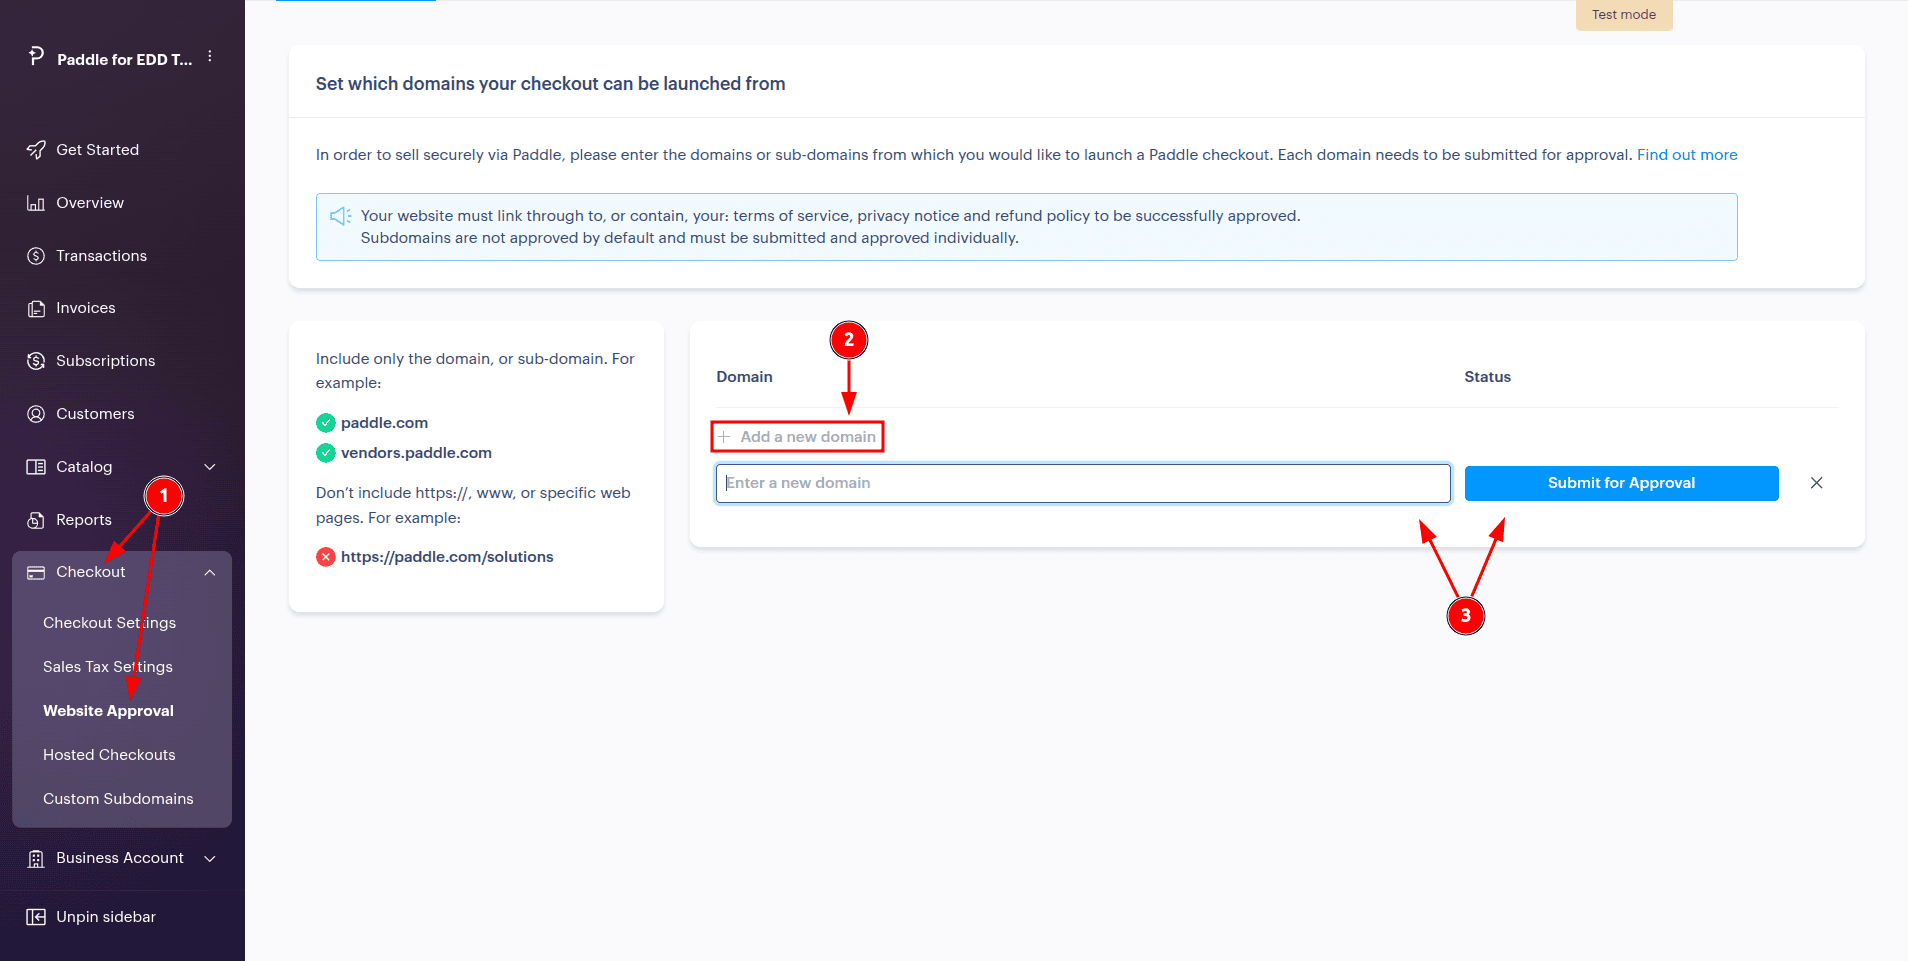
Step 3: Approve Your Website Domain
In your Paddle dashboard, go to Checkout > Website Approval.
Click the Add a new domain button.
Enter your website Domain and click the Submit for Approval button.
Please refer to the following image for a better understanding.
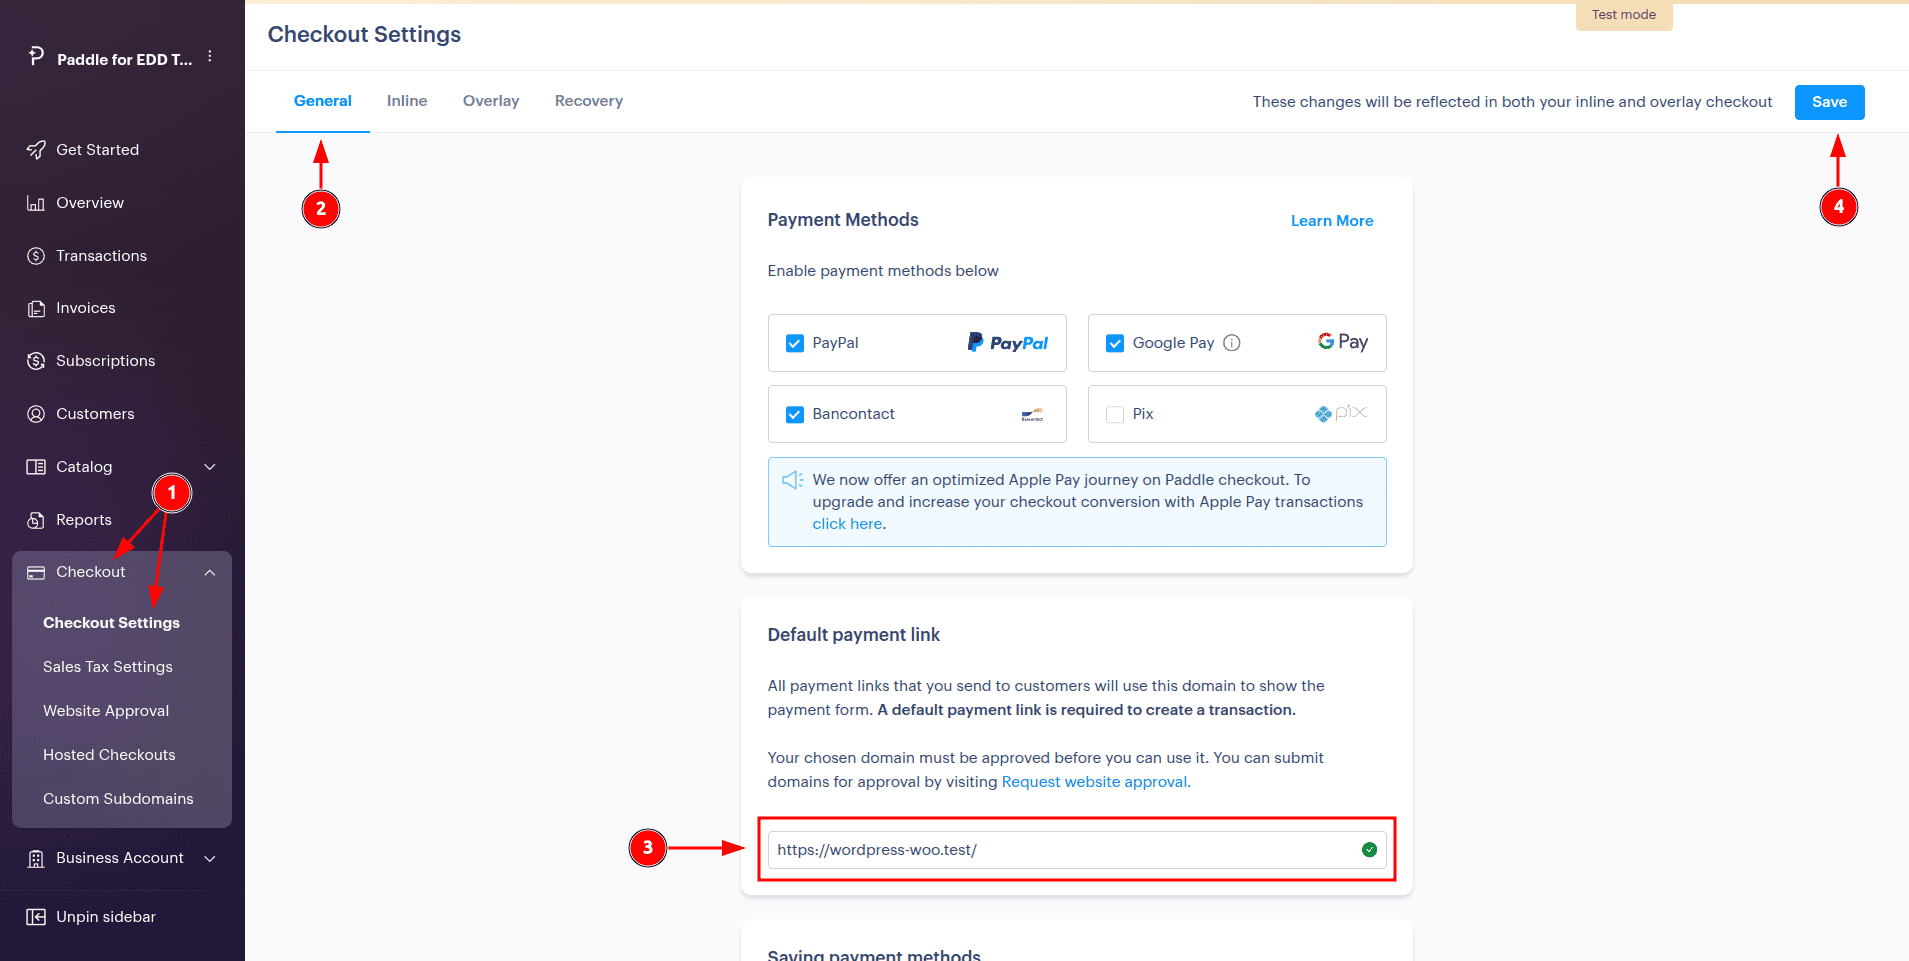
Step 4: Add the Default Payment Link
In your Paddle dashboard, go to Checkout > Checkout Settings.
Enter your Homepage URL in the Default payment link.
Please refer to the following image for a better understanding.