
WP SmartPay Pro includes a library of ready-made payment form templates. Instead of building a form from scratch you pick a template, and it opens in the editor with blocks, pricing settings, and layout already configured — ready to customise in minutes.
Opening the Template Picker
- Go to SmartPay → Forms → Add New.
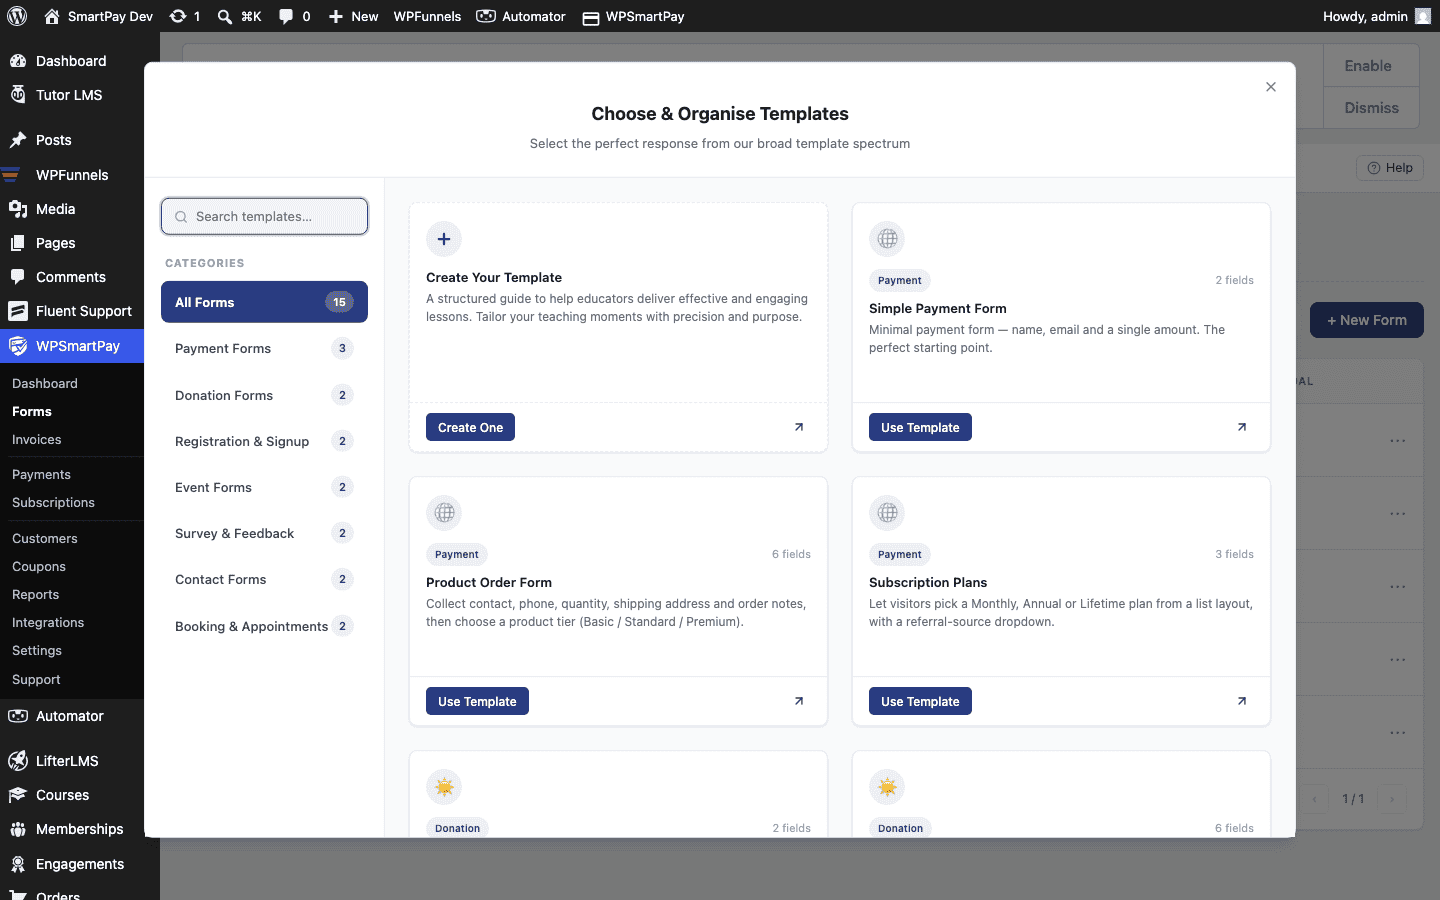
- The New Form modal opens. With Pro active you will see template cards alongside the Blank Form option.
Available Templates
The template library includes designs for the most common payment use cases:
- Donation Form — Suggested amounts + open input + goal progress bar.
- Event Ticket — Fixed price with attendee name and email fields.
- Digital Product — Product title, image block, and fixed price.
- Monthly Membership — Recurring billing with subscription interval pre-set.
- Online Course Enrolment — Single payment with course name and description.
- Simple Invoice — Minimal layout for professional B2B payments.
Selecting a Template
- Hover over a template card to see a short description.
- Click the card to select it.
- Click Create Form (or similar confirmation button).
- The form editor opens with the template's blocks, pricing, and options pre-filled.
Customising After Selection
Templates are starting points — every part of them is editable:
- Change the form title in the title field at the top.
- Edit, delete, or add blocks on the canvas (headings, images, text blocks).
- Adjust pricing amounts, type, and amount cards in the Pricing panel.
- Switch the checkout layout in the Options panel.
- Select a different gateway in the Payment panel.
Selecting a template does not lock you into anything — treat it as a head start, not a constraint.
Note: Templates require WP SmartPay Pro. With the free plugin only the Blank Form option appears in the New Form modal.