
WP SmartPay Pro lets you create invoices proactively — before the customer has paid — and send them a link to pay directly from the invoice. This is ideal for B2B billing, project work, or any situation where you need to bill before delivering a product.
Opening the Invoice Creator
- Go to SmartPay → Invoices.
- Click Create Invoice at the top right.
- A drawer panel slides in from the right.
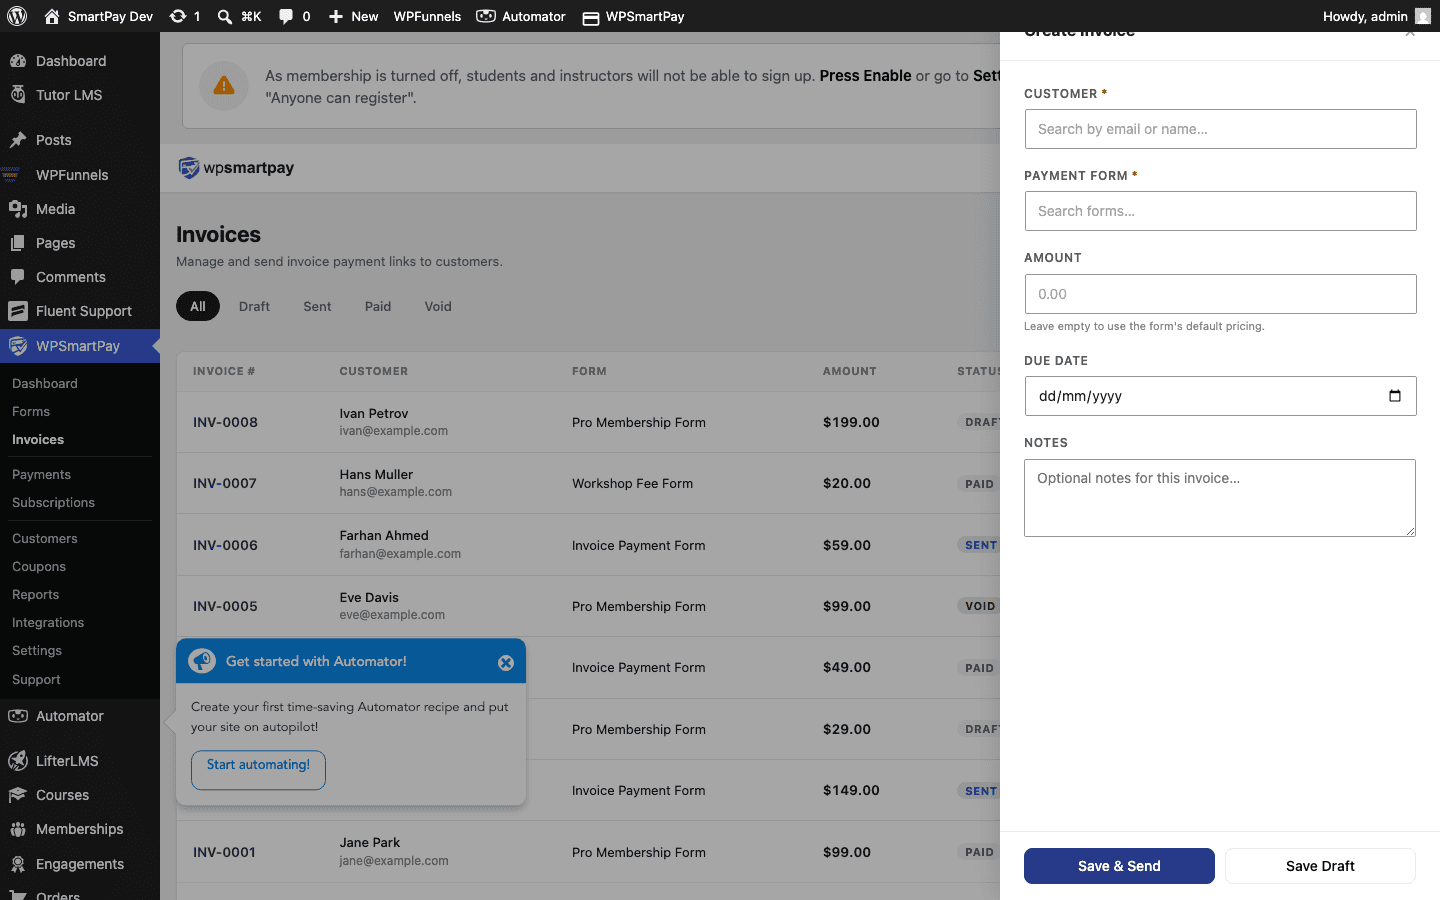
Required Fields
Customer
Search for an existing customer by email or name. If the customer has not paid through SmartPay before, type their email address to create a new customer record on the fly.
Linked Form
Associate the invoice with a payment form. The form determines which SmartPay integrations fire when the invoice is paid (LMS enrolment, email sync, etc.).
Line Items
Add one or more line items to the invoice:
- Description — What is being billed (e.g., "Website redesign — Phase 1").
- Quantity — Number of units (default 1).
- Unit Price — Price per unit.
Click Add Line Item to add more rows. Each row calculates its own subtotal (quantity × unit price).
Tax & Additional Charges
If tax is configured on the linked form, it appears automatically. You can also add an additional charge (flat or percentage) in this section.
Due Date
Set a due date for the invoice. Invoices past their due date automatically move to Overdue status.
Saving the Invoice
Click Save as Draft to save without sending, or Send Invoice to create the invoice and immediately email the payment link to the customer.
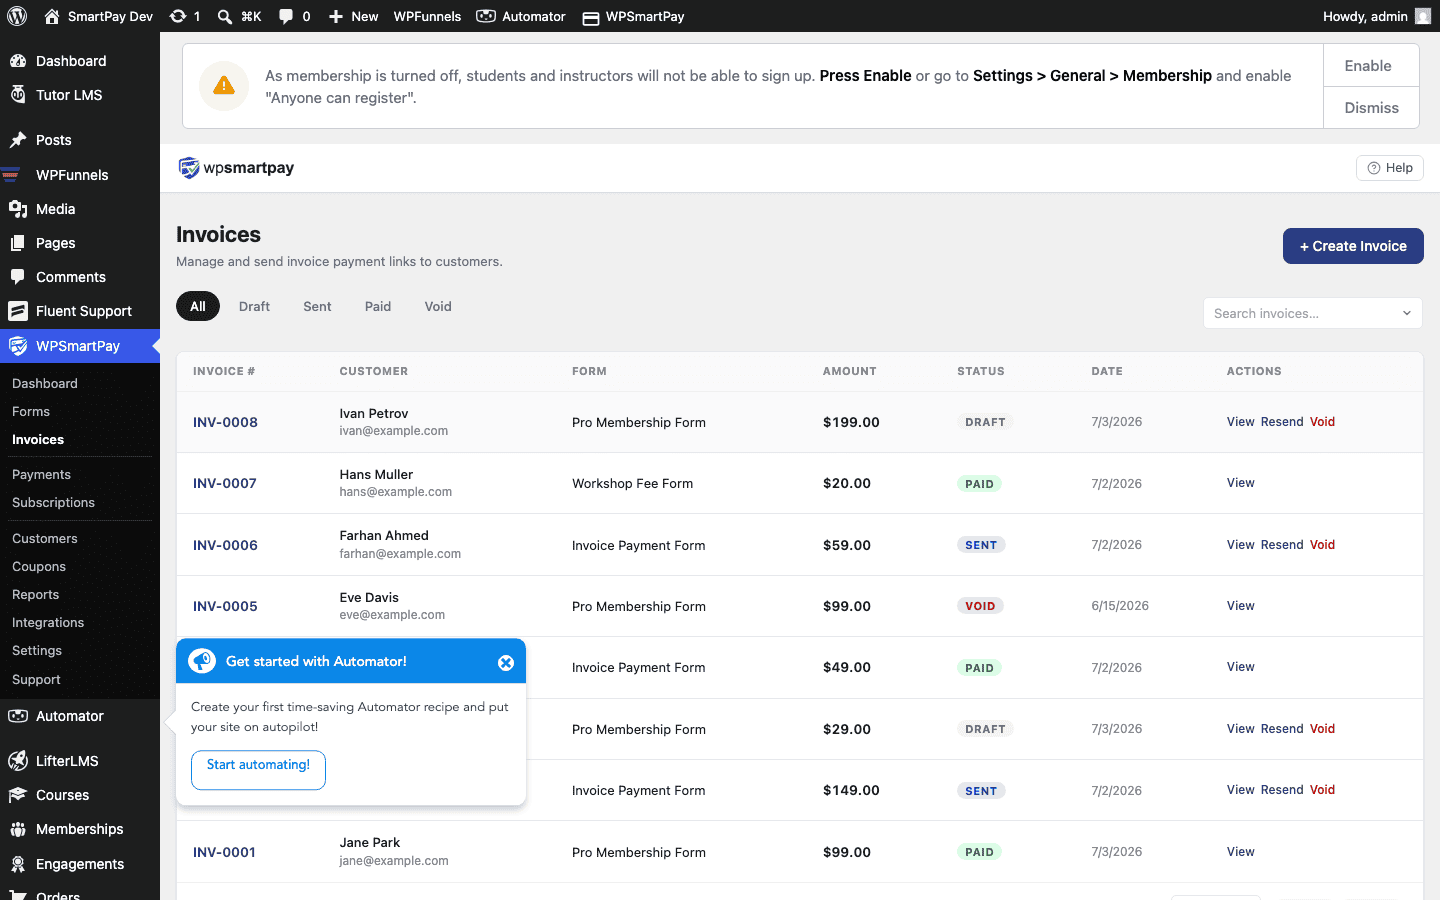
The invoice status changes to Sent when the email is delivered.
Shareable Payment Link
Every invoice has a public URL that you can share with the customer directly. The invoice page shows all line items, totals, and a pay button. When the customer pays, the invoice is marked Paid automatically.
Tip: Copy the invoice public link from the invoice detail page and paste it into any email, messaging app, or quote document. No SmartPay account is needed for the customer to view and pay the invoice.