
Selling a PDF guide, a template pack, an ebook, or a software license doesn't require WooCommerce. WP SmartPay's payment forms collect payment and trigger email delivery through your email marketing or automation tool — customers receive their purchase instantly without you lifting a finger.
Scenario
A designer sells a Figma UI kit for $49. After purchase, the customer should immediately receive an email with the download link. The designer also wants buyers automatically added to a "Customers" email list for future product announcements.
What You Need
- WP SmartPay (free) for the payment form
- WP SmartPay Pro for email marketing integrations
- A payment gateway (Stripe recommended for instant processing)
- An email marketing tool: Mailchimp, MailerLite, ActiveCampaign, or similar
Step 1: Host Your Digital File
Upload your file to a secure location. Options include:
- A password-protected page on your site with the download link
- Google Drive or Dropbox with a shareable link
- A private page with your file embed
Keep this URL private — it will only be shared via the confirmation email, not publicly.
Step 2: Create the Payment Form
- Go to SmartPay → Forms → Add New.
- Set the price to $49 (fixed amount, no subscription).
- Add a product name like "Figma UI Kit — Premium Pack".
- In the form settings, set the Success Redirect URL to a "Thank You" page that explains the buyer will receive an email shortly.
Step 3: Configure the Confirmation Email
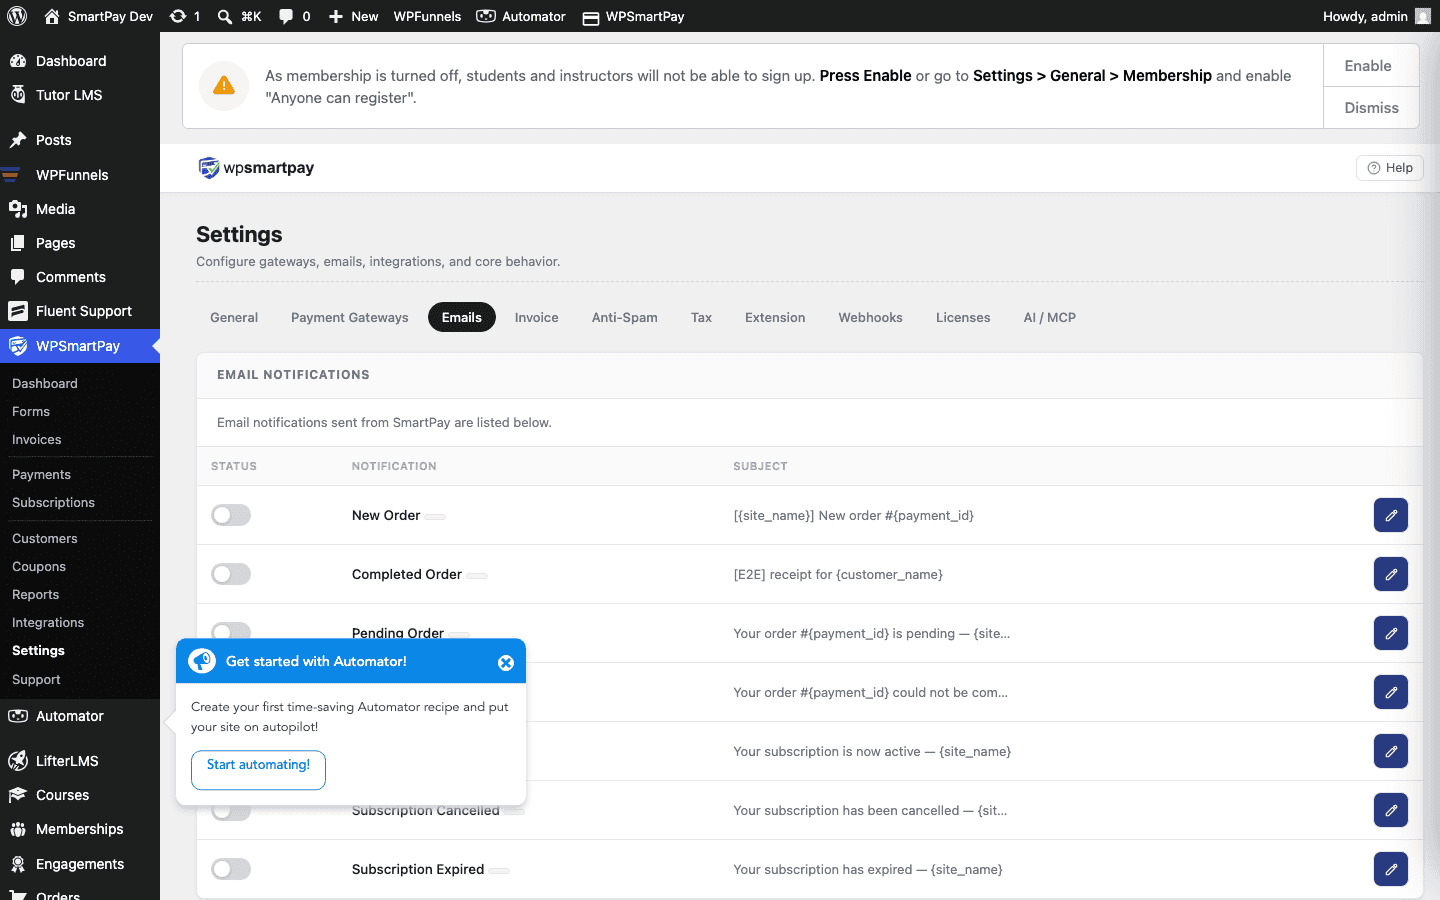
- Go to SmartPay → Settings → Email Notifications.
- Open the Payment Received email template.
- In the email body, add your download link:
Hi {customer_name}, Thank you for your purchase! Here's your download link: {download_url} This link is personal to your purchase. Please don't share it publicly. Enjoy! {site_name} - Save the template.
Step 4: Add Buyers to Your Email List
- Go to SmartPay → Extensions and activate Mailchimp (or your preferred tool).
- Enter your API key and select the audience list to add buyers to.
- Map the SmartPay form to that list — buyers are added automatically after payment.
Step 5: Test the Purchase Flow
- Enable Test Mode in SmartPay settings.
- Submit the form with a test card (e.g.,
4242 4242 4242 4242for Stripe). - Check your email inbox — the confirmation email with the download link should arrive within seconds.
- Verify the buyer was added to your email list.
- Disable test mode when ready to go live.
Result
The buyer submits payment, Stripe processes it in real time, SmartPay fires the payment confirmation email, and the customer has their download link within seconds. No orders to fulfill, no manual follow-up, no WooCommerce needed.
Handling Multiple Products
Create a separate SmartPay form for each digital product. You can list them all on a single "Shop" page using multiple shortcodes side by side, styled with CSS columns. Each form sends its own product-specific confirmation email.
Tips
- Use Zapier integration to connect SmartPay to Gumroad, Notion, Google Sheets, or any tool not natively supported.
- Generate a time-limited URL by hosting files in Amazon S3 with pre-signed URLs, then include the link in the SmartPay confirmation email.
- Add a coupon code field to the form so you can run launch discounts without changing the base price.