Do you want to accept recurring payments on your WordPress website?
Billing consumers on a subscription basis can be time-consuming and labor-intensive. On each payment date, you had to send invoices, refer customers to customized payment forms, or enter their credit card information.
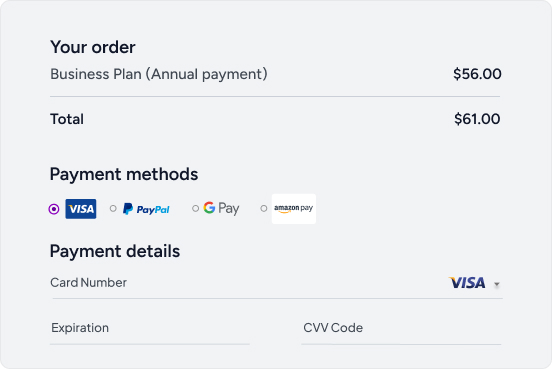
Recurring billing allows you to charge your customers regularly, such as weekly, monthly, quarterly, annually, or at your discretion. You can even take repeat payments without troubling your consumers.
This post will demonstrate how to accept recurring payments on your WordPress website with WPSmartPay effortlessly.
Understanding WPSmartPay?
WPSmartPay is an all-in-one payment plugin for WordPress. It offers several valuable features that can help you to sell digital or physical goods using Stripe, PayPal, and Paddle without setting up a shopping cart. Also, you can set up recurring billing for your website, subscription services, membership fees, and many more with WPSmartPay.
Some of the features of the WPSmartPay WordPress plugin include the following:
- Unlimited products selling
- Embedded payment forms
- Payment form templates
- Subscription & recurring billing
- Stripe, PayPal, Paddle integration & more
- Allows Apple pay and Google pay
- CRM integrations
- Regular product updates & new features
- Email Support from our global team.
Benefits of WPSmartPay
WPSmartPay handles the billing process automatically, so you don’t need to worry about anything. It also allows you to send receipts and invoices to your customers or clients. You can also even customize your payment page to make it more attractive to your customers.
- Automate billing, so you don’t have to cash checks, use credit cards, or send invoices every month.
- Due to the automation of the system, there are fewer late or missed payments.
- Inertia improves customer/donor retention. Customers will likely be retained because they don’t have to make new purchasing decisions monthly.
- Your payment information stays secure with less duplication/distribution of sensitive information.
- Less awkward conversations with customers about late or missed payments improve overall relationships.
- Cash flow is more predictable because you don’t have to wait for someone to pay you.
How to set up recurring payments with WPSmartPay
The process of accepting recurring payments in WordPress is so straightforward. You must ensure you have the right setup to do it.
First, you need a WordPress website and a payment plugin. In this guide, we will use the WPSmartPay plugin to do so.
Step 1: Install and Activate WPSmartPay
The easiest way to install WP SmartPay is to upload the plugin from your WordPress admin. However, it also describes how to install manually via FTP upload.
Before installing, you should check the system requirements of the plugin. You should also make sure you have installed and activated Easy Digital Downloads.
WP SmartPay EDD is a standalone plugin that needs to be purchased and installed separately.
To install, go to your WordPress backend and under Plugins, go to Add New and then Upload Plugin. Click Choose File and locate the WP SmartPay ZIP file on your computer. Click Install Now. Once the upload is complete, click the Activate Plugin button.

Follow this guide to install WP SmartPay via FTP.
Step 2: Configure Payment Methods
In the previous step, we installed the WP Smart Pay plugin, and to start accepting recurring payments; we need to add payment methods such as Paddle, Stripe, PayPal & many more.
To add PayPal as a Payment Gateway, you must follow the procedure explained below.
In the WordPress admin panel, go to Smartpay > Settings. Select Payment Gateways Tab. In the General tab Under Payment Gateways, you will see that PayPal Standard is selected by default.

Next, Select PayPal Standard Tab under Payment Gateways. Next, Put PayPal Email and Paypal Identity Token in the input box. Click on the Save Change button to save the settings

Now you are ready to use PayPal as a payment gateway in WPSmartPay.
If you want to install any other Payment Gateway, Follow this guide…
Step 3: Create a Basic Payment Form
As you have connected to a Payment Gateway of your choice, Our next step is to create a Recurring Payment Form. For the sake of this article, let’s create a Basic Payment Form.
In WordPress admin, go to Smartpay > Forms. You will find all the Forms. Click Add New to create a new Form.

You will find a Gutenberg-based form builder. Change the Form Title. Add necessary form fields.

Step 4: Configure the Form to Accept Recurring Payments
Now that you have created a Basic Payment Form for further procedure let’s configure the form to accept Recurring Payments.
Click on Pricing Tabs. You will get the Form amount-related Fields to customize to your choice.
Change the Billing Type from One Time > Subscription to accept recurring payments. Add Billing Period and Amount.

If you need to charge your customer an Additional Charge/Setup fee/Signup fee when completing a payment, you must add the additional amount when you set up your form or product. It is sometimes referred to as a surcharge, setup fee, surcharge, etc.
Step 5: Add the Recurring Form to a Page
After finalizing Form Fields and Form Amounts, Click Publish Button. You will get a Preview Button. Click on Preview Button. This will take you to the frontend of that form.
Now you can provide this Form URL to customers and start receiving customer payments.

Conclusion.
We hope you enjoyed our article on how to accept recurring payments in WordPress. With all the best advice out there, it can be difficult to know where to start if you’re wondering how to accept recurring payments.
In this article, we went over the best ways to do it, and now you can build recurring billing into your website with WPSmartPay. If you have any questions about our article, don’t hesitate to reach out to us at Contact us.